Remember in Jun when I first introduced you to Windows To Go in my article Windows To Go: Taking Windows 8 With you? I just recently came across an even more easy way to get Windows booted from a USB stick. You Don’t need to have the Windows Enterprise edition and we’ll only be using free available software for this. In this guide I will show you how to use the free software Rufus to create Windows To Go drive with just a few mouse clicks.
Some things to remember
- Microsoft offers “Windows To Go Certified Drives,”. We recommend you to use these certified devices as they are tested for using the Windows To Go feature. Normal USB flash drives are not ideal for installing Windows, meaning that the Windows OS installed on your normal USB flash drive will be very slower compared to the one installed on certified drives.
- Windows To Go feature in the Rufus software only works when you are running the software on Windows 8, Windows 8.1, or Windows 10 versions.
- You don’t need to have the Enterprise edition for this to work
- If you want some background information on Windows To Go
- You can ready my previous article
- Wikipedia also has some great information on the subject.
- A USB 3.0 or external HDD with 16GB of space, with high read and write speeds. However we would recommend to use a 32GB one.
Using Rufus to prepare Windows To Go
- Start by going to the Rufus website and download the latest version of their software
- Connect your USB flash drive that you want to use as Windows To Go drive and backup all data from the drive to any other location! The drive needs to erased completely and all data will be deleted while doing so.
- Start the Rufus software
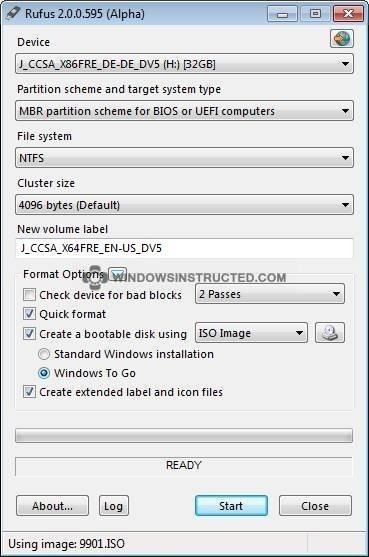
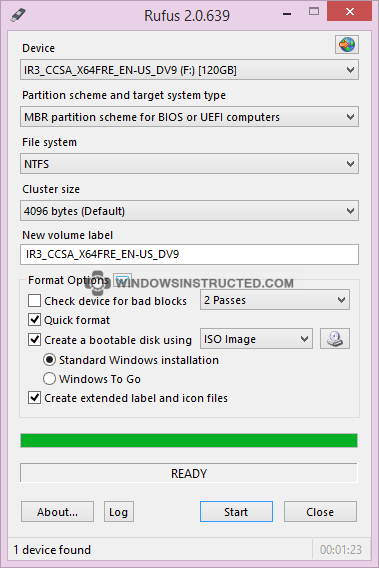
- From the device menu, select your newly inserted USB drive
- Then select the “MBR partition scheme for BIOS or UEFI computer” from the partition menu
- You will have to select NTFS as the File system since FAT32 can’t be used to create the Windows To Go stick.
- You can safely skip the Cluster size section, so don’t change this unless you know what you are doing.
- Under format options, make sure you select the Windows To Go option before clicking on format
- Click the icon next to Create a bootable disk using option to browse to your Windows ISO file
If you haven’t used a Windows Certified Drives you might get an error saying “You are trying to install Windows To Go, but your target drive doesn’t have [..]”. You can ignore this warning (click Yes) but your drive might not work as good as the real one would.

Next, you’ll see “Your USB drive will be erased” warning. Click OK button to begin installing Windows. The software will take a couple of hours to prepare the Windows to Go drive. On the WindowsInstructed test pc, it took almost 70minutes before it was completed and might even been longer on your pc.
After the ready message, feel free to restart your pc and start using your new Windows To Go USB drive. If you have any questions, feel free to commend on this article or ask your question in the Q&A section of WindowsInstructed.
